Fresh oysters can feel like an invitation to the ocean itself: briny, cold, and alive with flavor. But for anyone who’s ever stared at that rough, ridged shell, wondering how on earth to open it without losing a finger, the appeal can quickly turn into hesitation.
The truth is, shucking oysters is far less intimidating when you have the right tools, a steady hand, and a method you can trust. With a bit of practice, it can even be satisfying – a small ritual that connects you directly to the source of your food.
We prepared a guide to shucking oysters safely and efficiently, plus tips for choosing, storing, and serving them so you can get the most from every shell.
Key Points
Why It’s a Good Idea to Learn This
Oysters are more than just an indulgent treat. In their natural environment, they filter massive amounts of water, up to 50 gallons a day, helping keep coastal ecosystems clean and balanced.
They also support biodiversity by creating habitats for fish, crabs, and other marine life. From a culinary perspective, learning to shuck at home means:
- Fresher flavor – no waiting for restaurant prep
- Lower cost – raw oysters at markets are often half the price of those served at bars
- Creative freedom – serve them plain, with mignonette, or in baked recipes, without being limited to someone else’s menu
Choosing the Right Oysters
Oyster flavor, size, and texture vary depending on where they come from. Knowing your options makes selection easier and more enjoyable.
| Oyster Type | Region | Flavor Profile | Best for Beginners? |
| Kumamoto | West Coast | Mild, sweet, melon-like | Yes |
| Atlantic (Eastern) | East Coast | Salty, crisp, briny | Moderate |
| Pacific | West Coast | Mild sweetness, cucumber finish | Yes |
| Olympia | West Coast | Strong mineral, metallic | No |
| Gulf | Gulf Coast | Large, meaty, robust | Moderate |
Buying Tips
- Look for tightly closed shells. An open shell that doesn’t snap shut when tapped is likely dead – skip it.
- Fresh oysters smell like clean seawater, never fishy or sour.
- Buy from trusted sources, preferably oysters harvested within the last 48 hours.
How to Store Oysters Before Shucking
Oysters are alive until you shuck them, so storage is about keeping them breathing and cold.
- Place them cupped side down in a shallow container.
- Loosely cover with a damp cloth to keep them moist without suffocating them.
- Keep in the refrigerator, ideally between 35°F and 40°F.
- Avoid sealing them in plastic or submerging them in water – both can kill them.
- For longer storage (up to 7 days), keep them on ice in a colander over a bowl, replenishing ice as needed.
Before shucking, scrub the shells thoroughly under cold running water with a stiff brush to remove grit and mud.
Tools You’ll Need
Having the right tools not only makes shucking easier but also much safer.
- Oyster knife – short, sturdy blade with a rounded tip designed for prying, not cutting
- Thick kitchen towel – folded to cushion and protect your hand
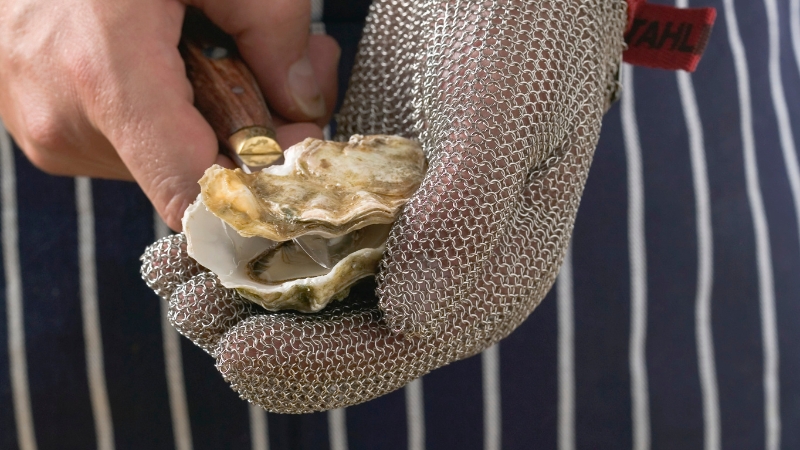
- Cut-resistant glove – optional, but highly recommended for beginners
- Scrub brush – for cleaning shells
- Bowl of ice water – to keep oysters cold during prep
- Serving platter with crushed ice or rock salt – for presentation
Safety First
Shucking accidents usually happen when the knife slips. To prevent injuries:
- Always protect the hand holding the oyster with a towel or glove.
- Keep oyster level to avoid spilling the liquor (the briny liquid inside).
- Work on a flat, stable surface – no balancing on the edge of a counter.
- Use slow, steady pressure rather than forceful stabbing.
- Clean the knife as you go to keep grit out of the meat.
Step-by-Step Process
Here’s the method professional shuckers rely on.
Step 1: Position the Oyster
Place the oyster cupped side down, hinge (pointed end) toward you. Fold your towel over the oyster, leaving the hinge exposed, and grip it firmly to keep it steady.
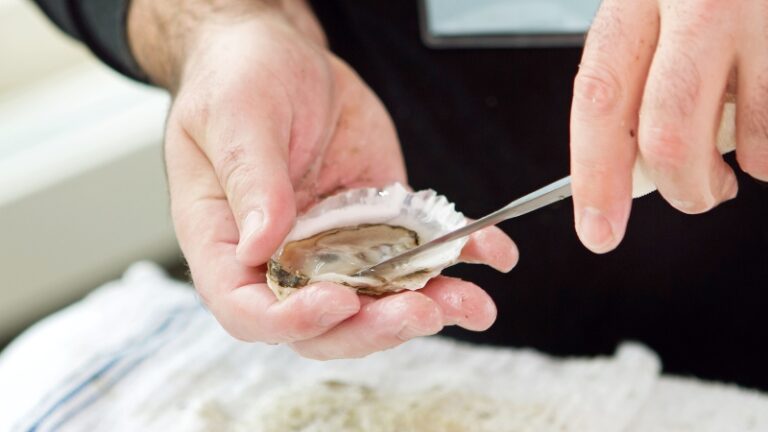
Step 2: Insert the Knife
Hold the oyster knife in your dominant hand. Wiggle the tip into the hinge using gentle, controlled pressure – like turning a key in a lock. Avoid stabbing; let the blade find its way in.
Step 3: Pop the Hinge
Once the blade tip is inside, twist slightly until you feel the hinge “pop.” That’s your sign the shell is ready to open.
Step 4: Cut the Top Muscle
Wipe the knife clean, then slide it along the inside of the top shell to sever the adductor muscle. Follow the curve of the shell to avoid damaging the meat.
Step 5: Remove the Top Shell
Lift off the top shell and discard it. Keep the oyster level so the liquor stays in the bottom shell.
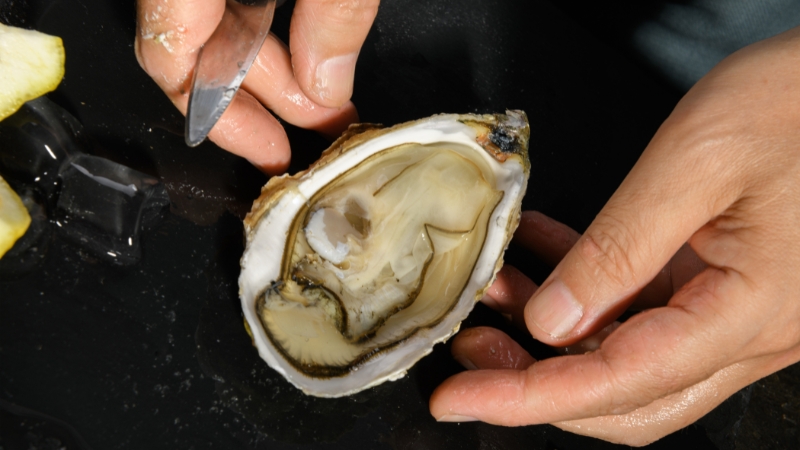
Step 6: Free the Bottom Muscle
Slide the knife under the oyster to cut the muscle attaching it to the bottom shell. Check for any shell fragments and remove them carefully.
Step 7: Serve Immediately
Place the shucked oyster on a platter of ice. Repeat with the rest, building rhythm as you go.
Common Mistakes to Avoid
- Using a regular kitchen knife – the blade is too thin and dangerous for prying.
- Applying too much force – risks breaking shells or slipping into your hand.
- Letting oysters warm up – always keep them chilled until serving.
- Forgetting to clean the shell – grit will ruin the texture.
- Spilling the liquor – it’s part of the flavor experience.
Tips for Getting Better
- Start with smaller, easier oysters like Kumamotos.
- Practice in small batches – a dozen is a good training round.
- Watch professionals at oyster bars; their technique is worth studying.
- Keep your blade clean and dry between oysters for a better grip.
- Don’t rush – speed comes naturally with repetition.
Serving Suggestions
View this post on Instagram
Shucked oysters are best enjoyed immediately, but how you serve them can elevate the experience.
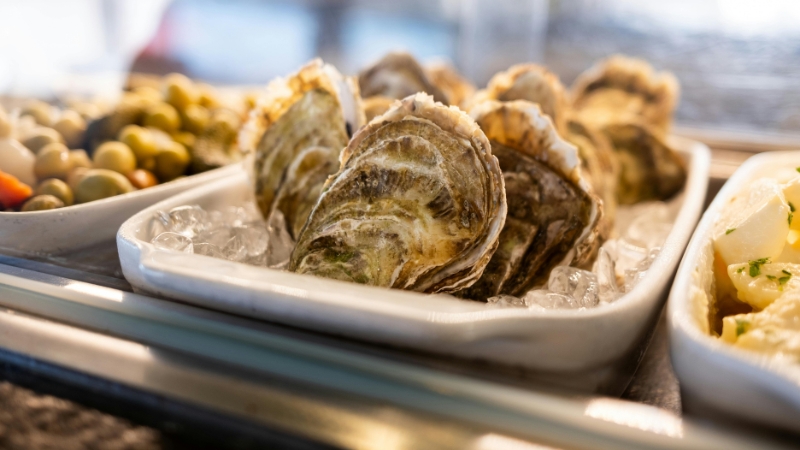
Classic Raw Presentation
- On the half-shell over crushed ice
- Garnished with lemon wedges
- Mignonette sauce (shallots, vinegar, pepper)
- Fresh horseradish or cocktail sauce
Cooked Variations
- Grilled with garlic butter
- Baked with breadcrumbs and herbs
- Broiled with cheese for a richer flavor
Pairings
- Crisp white wines (Muscadet, Chablis, Sauvignon Blanc)
- Dry sparkling wines or Champagne
- Light beers or dry cider
Oyster Shucking at Events
@visitmarthasvineyard Have you ever attended an event with an oyster shucker walking around feeding you raw fresh oysters?! Make dreams come true with @CottageCityOysters on Martha’s Vineyard! Such a fun addition to your #MarthasVineyard ♬ Cruel Summer – Taylor Swift
At large gatherings, oysters can be shucked in batches and served quickly. Professional shuckers at festivals can handle hundreds per hour, but at home, aim for quality rather than speed.
Serving them on rock salt instead of ice can also be a practical choice if ice isn’t available – it keeps them steady and looks elegant.
Final Thoughts
Shucking oysters is part technique, part patience, and part respect for the ingredient. Once you’ve done it a few times, it becomes second nature.
You’ll find that the ritual – setting up your tools, feeling the hinge pop, lifting the shell to reveal the glistening meat – adds to the enjoyment of eating them.
With the right oysters, proper storage, and a safe, steady method, you can confidently prepare them for friends, family, or just yourself.
And there’s something undeniably satisfying about serving oysters you’ve opened with your own hands, knowing you’ve preserved every drop of their briny essence.